Saturday 27 June 2015

The skirmish at Three Tuns Bridge, an ECW scenario

This week we are back again in the rolling acres of Kelhamshire, playing out the continuing struggles between the forces of Lord Melchett and Sir Victor Meldrew.  Both these gentlemen have plans for a decisive attack against their opponent and both have settled on the first step being the securing of a crossing over the river Kelham.  Unfortunately, they have also both chosen the same crossing to secure, Three Tuns Bridge; so called because of the hostelry that lies adjacent to the bridge.  Both forces are similar in size, though the Royalists have a larger percentage of cavalry and the Parliamentarians more infantry.  We were using the Pike and Shotte rules and decided to try out a variant that had combined musketeer and pike infantry instead of separate ones.  The dice decided that I should take the part of Sir Victor and accordingly I deployed my forces with the infantry commanded by Ralph Muncaster in the centre and cavalry on the wings.  On the right was Colonel Roderick Livesey, with his own regiment and that of Colonel Ughtred Shuttleworth.  The left wing cavalry was commanded by Ezekial Carpenter and comprised two units, a regular unit of horse and a small regiment of cuirassiers.  Meldrew's single unit of dragoons, (Colonel Rigby's), were on the road leading to the bridge.  My plan, (such as it was) was to push the dragoons forward as fast as possible, seize the bridge and hope that the infantry would arrive in time to consolidate my position at the vital point.  The cavalry was simply to occupy the enemy horse as long as possible so that my more numerous infantry would prevail in the centre.

Rigby''s dragoons move forward
Lord Melchett deployed his forces in a similar fashion; with the infantry commanded by Sir Harry Vane in the centre, with Sir Fleetwood Hesketh's 3 regiments of cavalry on the right and Sir Laurence Towneley's two regiments on the left.  The Royalist dragoons were ordered to occupy an enclosure covering a ford over the river Kelham to stall any enemy advance.  His plan was to seize the bridge with the infantry and hold the position as long as possible, giving time for the cavalry to sweep their opponents aside and then envelop the centre.  The Royalist cavalry did have an advantage in that they were 'gallopers' who would counter-charge, whereas the Parliamentarian cavalry were 'caracole' whose charge reaction was to stand and fire.

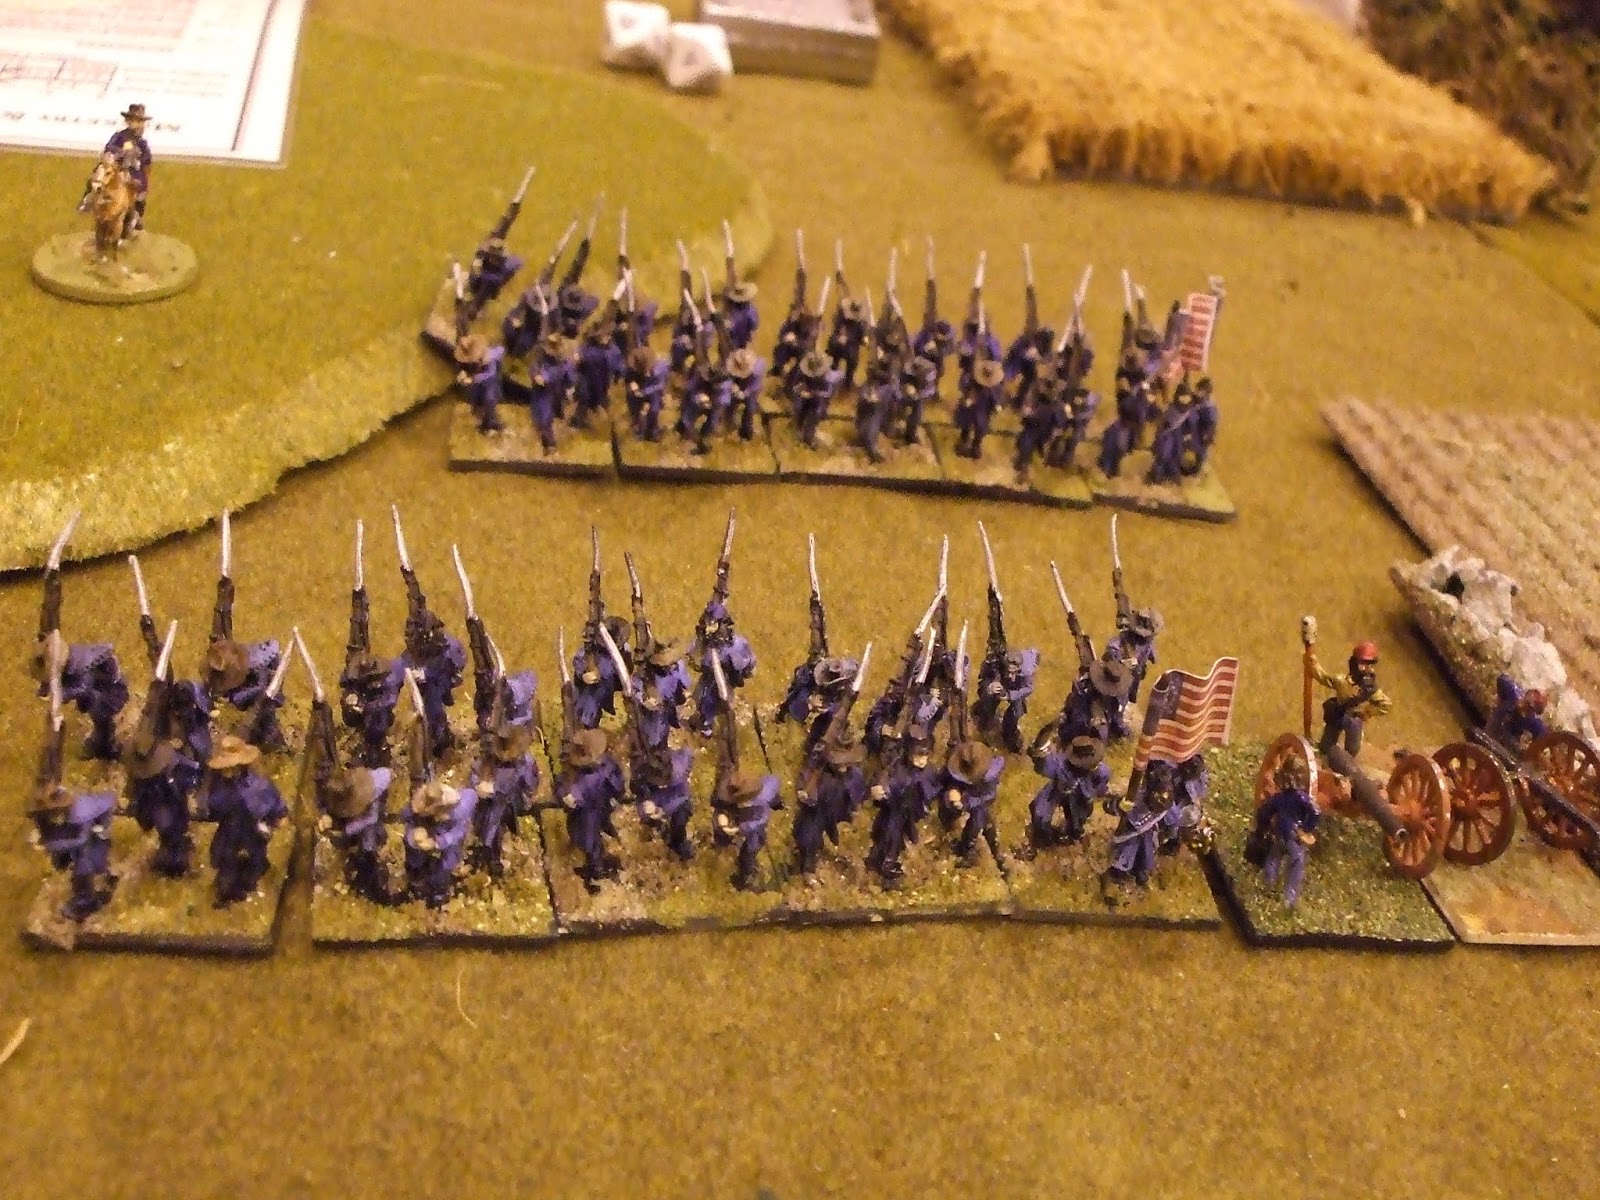
The Parliamentarian infantry close up to the Kelham
Proceedings began and Sir Victor's dragoons galloped forward along the road keen to impress their general.  Muncaster's infantry were less enthusiastic, but at least they were moving, which is more than could be said for the cavalry on the flanks.  The Royalist  centre also advanced with a purpose quickly getting into a position close enough to the bridge to prevent any 'coup de main' by Rigby's dragoons.  More ominously for Parliamentary fortunes the Royalist cavalry also moved forward, Hesketh's clearly intent on crossing the Kelham by the ford and then falling on the flank of Muncaster's infantry.  Fortunately, for Meldrew, Carpenter shrugged off his earlier lethargy and moved forward to cover the ford, halting just within pistol shot.  On the opposite flank, Livesey's regiment also 'stirred their stumps' and charged forward towards Towneley's regiments.  Unfortunately, Shuttleworth's did not follow suit and the leading regiment was unsupported when the Royalist horse crashed into them.  Perhaps unnerved by an ineffectiveness of their pistol volley, Livesey's men quickly gave way and rapidly fell back on their supports.  The pursuing Royalists in turn now outran their supports and a charge by Shuttleworth's regiment regained the lost ground.  Now Towneley's second regiment intervened and crashed into Shuttleworth's whilst they were still recovering from their exertions.  Fortune favoured the Royalists and following a hard fought melee the Parliamentarian horse broke and routed back towards their lines.  Attempts by Livesey to halt the rout were ignored by the troopers who streamed from the field and played no further part in the battle.

Hesketh's Cavalry
Rigby's dragoons had also fared badly.  The colonel had quickly appreciated that it would be impossible to seize the bridge in the face of the enemy infantry and therefore turned to his right to enter an enclosure from which he could fire at any enemy troops which ventured across the river.  As he turned away the rear of his column was fired upon by Royalist light artillery.  Only one roundshot found it's mark and it emptied a few saddles, but the effect was dramatic.  Rigby's raw recruits were unnerved by coming under artillery fire and all order dissolved; the unit routing towards the rear.  As they fell back they saw Shuttleworth's routing and thinking the day lost they joined in the rout and also left the field.  Sir Victor was furious as he saw the two.units flee from the field.

[It should be said at this point that Steve had made a local amendment to the break test as he thought that a 1 in 6 chance of a unit being removed from play was too severe.  He therefore ruled that if a unit got a result which would remove it, a ROUT marker would be placed instead. The unit would move back two actions, ie 12" for infantry and be tested again the following move.  Only if the unit failed again would it be removed.  The chance of an individual unit being removed therefore lengthened to 1 in 36.  Suffice it to say that Sir Victor rose to the challenge and managed to get two units to beat the odds.]

Dutton's ill-fated attack
Fortunately, Muncaster's infantry had now reached the bank of the Kelham and were firing at the Royalist infantry lining the opposite bank.  Their greater numbers began to take effect, causing one enemy regiment to fall back to reform and cause another to slacken it's fire.  To relieve the pressure Lord Melchett ordered Hesketh to move one of his regiments of horse across the river and then charge the infantry. Hesketh protested that his cavalry may be disordered by the crossing and would be faced by close range artillery fire, but Lord Melchett was adamant and Hesketh had to give the order.  It was as he feared.  Dutton's regiment crossed the river but were disordered by climbing the slippy bank and as they reformed they were hit by hail shot from a light gun.  Disordered again, they were then hit by a second round and this broke their resolve and they fell back across the river.

Hesketh's men take on the 'lobsters'
At the ford, Carpenter's men continued to fire their pistols at the Royalist cavalry who were struggling to get across the river and in a position to charge.  Hesketh was amazed that the enemy had not charged him, but determined to make the most of his fortune when the opportunity came he charged.  The Parliamentary horse were driven back and the cuirassiers tried to stem the tide.  They bought the time for their comrades to reform, but were forced back eventually.  Try as he might, Carpenter could not halt the inexorable Royalist advance.

In the centre, Sir Victor had ordered Muncaster to deploy his red regiment to counter a flanking move by Lord Melchett.  Two Royalist infantry regiments had crossed the Kelham and were trying to outflank Muncaster's line.  Supported by a light gun the Parliamentarian infantry slowed the Royalist advance and when charged repulsed the attack.  Driven forward again by Sir Harry, the Royalists came on a second time,   Shrugging off the closing salvo from the Parliamentary foot they managed to secure a lodgement along the hedgerow.  Close quarters combat ensued, with heavy casualties on both sides.

The Red Regiment try and stem the tide
 Along the banks of the Kelham the infantry fire fight continued.  Lord Melchett had managed to rally his troops and their fire had forced one of Muncaster's units to fall back.  Undaunted, Muncaster ordered a charge across the river, sensing a wavering in the opposition ranks  On the Parliamentarian right, Livesey had reformed the remains of his command and had charged the Towneley's cavalry.  His bravery was not rewarded., Although his men fought hard, they were overwhelmed by their more numerous foes.  The few remaining streamed from the field, Sir Victor's flank lay open and when the Royalists reformed they saw a golden opportunity to press home their advantage.  Below them, the hard pressed red regiment had begun to give ground.  Outnumbered two to one, they had done all that could be asked of them, but numbers told in the end.  Slowly, and then in increasing numbers men began to leave the line and head back across the fields.  The officers tried in vain to keep the unit together, but apart from a few veterans, who understood the perils of leaving a formed body, it was a hopeless cause.  The infantry raced across the field seeking the 'safety' of their previous nights camp, not aware that to their left, on the ridge lay Towneley's troopers.  No detailed order was necessary, the Royalist horse understood what needed to be done.  As one they swept down from the ridge and completed the destruction of the unfortunate Parliamentary infantry.

The end of the Red regiment
As Sir Victor received news of this disaster, more bad tidings arrived from the left.  Carpenter's cavalry had been driven from the field and Muncaster's  men were in danger of being surrounded. Hurriedly, orders were sent to Sir Ralph telling him to pull back.  This he did with some reluctance, his men almost reaching the Three Tuns.  However, the army needed preserving and Sir Victor appreciated that it was far better to pull back now, whilst he could and fight another day.

A most enjoyable game which ebbed and flowed.  The new ruling regarding broken units seemed to work better (in spite of my best attempts to wreck it with low dice rolls !)

Friday 26 June 2015

Relief of Gloucester part 2

John very kindly sent me copies of photos he took on Sunday.  He took the part of Rupert, so they are taken from the Royalist left wing.  He uses the camera in his tablet computer and it seems to cope better with the full table shots than my 'point and shoot' Finepix.

Whilst the Royalist cavalry edge forward, the Parliamentary infantry advance


The Parliamentary cavalry move forward

Just before the clash

Rupert's men are pushed further and further back

A view along the table as Parliament gains the upper hand
Thank you very much John

Wednesday 24 June 2015

The Relief of Gloucester, an ECW scenario for Pike and Shotte

The Sunday following the St Helens show, Steve hosts a game.  His scenario this year came from the ECW and proposed that, instead of withdrawing and lifting the siege of Gloucester, the Royalist army stood it's ground and opposed the advance of the Earl of Essex's army.  We used the Pike and Shotte rules and each army consisted of four commands; two infantry commands in the centre and one cavalry command on each wing.  The Royalists were deployed in the enclosures in the valley of the Severn, whilst the Parliamentary army was on the last slopes of the Costswold ridge.
Eight of the Gentlemen Pensioners took the commands whilst Steve and I acted as umpires.  I was at the Royalist left flank end of the table and had only brief forays to see how events were unfolding elsewhere.

Lord Forth's infantry on the Royalist left

In his briefing, King Charles was keen that his nephew, Prince Rupert remembered that this was a 'defensive' battle and as things turned out that advice was heeded.  The Parliamentarian plan was to hold the expected Royalist cavalry onslaught on the wings, whilst the infantry pushed forward into the enclosures.

The Parliamentary right wing
First moves saw the Parliamentarian cavalry edging forward keeping pace with their infantry support and some dismounted dragoons.  The main infantry command on the right swept forward (Phil rolled low dice allowing him three moves).  For their part the Royalist cavalry made small moves forward to gain more deployment room, but no mad cap charges (even though one roll would have allowed it).  The Parliamentary infantry's big move forward had brought them into musketry range, but most of the Royalist infantry were slightly back from the hedges and thus unable to fire, meaning that, at most, the attackers would only have to endure two volleys before they closed.

Parliamentary infantry reach the hedge

On turn two the first volleys were fired by the Royalists and soon it was "push of pike" along the hedge line.  The Royalists had some light guns in support and this helped repel the first attack.  However, after a pause the Parliamentary infantry came on again and this time forced one of the Royalist regiments to retreat.  Losses had been heavy on both sides and in the subsequent break tests, I adjudicated that two of the Parliamentary units had routed.  [This is a local 'amendment' that we have adopted as we feel that the break test is too quick to remove units from the field.  The routing units had a second chance to pass the break test, but if that is also failed then they are removed].  It was only after a couple of moves that I realised that, as large units the infantry had 5 strength points instead of 4 and that no test had been required.  It is to Phil's credit that he accepted this philosophically, even though it was akin to being given out LBW by the umpire when the ball had pitched outside the line, would have missed the stumps and the bowler had overstepped the crease!

Cavalry melee on the Royalist left
Anyway what had Prince Rupert been doing in this time?  One unit had charged some artillery which had moved forward to support the Parliamentary cavalry, but it had suffered heavy casualties and failed to charge home.  A subsequent round from the artillery had imposed a test which had been failed and the cavalry routed back through their supports.  As the Parliamentary cavalry came forward the Royalists had charged them, and received point-blank pistol shots as they closed.  In the melees which followed the much vaunted Royalist cavalry were soundly beaten and forced to fall back, becoming disordered in the process.  (their cause was not helped by some unlucky dice rolling by Rupert).  Whilst they were disordered the Royalists could not charge or counter charge and this enabled the Parliamentary cavalry to seize the initiative.  They pressed forward pushing the Royalists back again and again.

Prince Rupert's troops are pushed back
Meanwhile, in the centre, the Parliamentary infantry pushed forward again.  They were initially held at the hedges, but slowly, they began to push forward, overrunning the Royalist supporting artillery.  Phil had received some support from the other Parliamentary infantry commander, Chris, but the majority of the latter's command  had not moved all morning.  A brief foray to the other end of the table showed that there too, the Royalist cavalry were coming off second best.  For a report on the action see Will's blog which also has some excellent photos.

The Battle for the hedges

From behind the Parliamentary position
The Parliamentary right ready to push forward

Plenty of Royalist infantry, but no cavalry
By mid afternoon, all of Rupert's command had been driven from the field and the Royalist infantry commanded by Lord Forth were in danger of being taken in flank.  We decided that the Royalists would have to retreat before they were enveloped by the enemy cavalry and that siege was raised (as happened historically), but the Royalist army was in a bad way and would need time to recover.

Many thanks to Steve for devising the scenario and to Dave, Phil, Chris, Will (Parliament); Ian, Roy, Nick and John (Royalist) for playing the game in such a good spirit.

Sunday 21 June 2015

Phalanx 2015

It's June, so the Gentleman Pensioners assembled for their annual visit to the Phalanx show at St Helens.  Steve and I were putting on our Liverpool Affray game as previewed in an earlier post.  The 'Pensioners helped us run the game and we had a good number of visitors to the show, including a couple of very enthusiastic young lads, who also joined in.  The game ran several times with honours being divided equally between the Stanley and Molyneux factions.  We set a time limit of one hour for the length of the game and a decision was reached by that time in all but one case.


As s usual the Phalanx show has a wide variety of games; next to the Lance & Longbow game was one covering WW1, First Ypres


Sci Fi and Fantasy games featured strongly, Battle of the Five Armies, with an excellent corner terrain feature


Dune themed game


Inside the mountain, a temple!


There was also a game using blocks rather than figures


An ACW game using 'Fire and Fury

 A game looking at urban civilian conflict, I think it was called 'Aggro'


More photos are available on Will'sblog

Once again the Spartans Club organised an excellent show, it was good to meet old friends, chat about ongoing projects and catch up on news.  Many thanks to the 'Pensioners', Neil, Roy, John, Ian, Bob, Will and Nick who helped with the game.  Here's to 2016!

Tuesday 9 June 2015

Muhlerburg 1813: a Shako scenario

This scenario is set during Napoleon's final campaign in Germany, with Vandamme's XIX corps on the Muhlerburg plateau, covering the flank of the Army of Germany.  A joint Austro-Russian force under the command of FML Rosenberg is attempting to copy Napoleon's own tactics and co-ordinate the march of several columns to reunite on the battlefield.  Vandamme has 5 divisions present, with another marching up in support.  The majority of these divisions are fairly weak, (including Domon's cavalry) and so Vandamme will need to husband his resources to avoid his army being destroyed piecemeal.  His objective is to hold his ground, inflicting the maximum casualties on his opponent.

Rosenberg has three divisions (15 battalions), of infantry under his immediate command.  The approach march through rugged terrain means that he has no cavalry support and his artillery are still struggling over the broken ground trying to reach the battlefield.  His plan is to make frontal pinning attacks, drawing the enemy on him and allowing his flank attacks under Hessen-Homburg and Frolich the best chance of making a decisive contribution.


Here is a sketch map of the table layout; the area below the abbey is impassable to all troops and the river is unfordable.  

Rosenburg ordered his infantry to advance behind a screen of jaeger and grenz.  Within minutes the French gunners had found the range and roundshot began to plough bloody lanes through the advancing white coated ranks.  The 3rd battalion of the Weidenfeld Infantry Regiment was particularly badly hit, losing over 25% of it's strength before reaching the slope up to the plateau.  Further to the right, the battalions of Deutschmeister also suffered casualties, but continued to press forward.  Ocksay's brigade was fortunate in that it had no artillery in front of it and the Austrians plodded forward towards the towering walls of the Abbey.  On the ridge, Lefol had quickly assessed that he was outnumbered 2 to 1 and sent a courier off to Vandamme, requesting the supporting divisions be sent forward. Vandamme had already ordered Berthezene to advance and support the troops holding the Abbey.  Another ADC was sent galloping towards Girard's division with orders to support Lefol's left.

French troops on the Muhlerburg
As the Austrian attack closed on the French line, another messenger arrived at Vandamme's position. He brought the unwelcome news that further Austrian forces were advancing from the south, threatening Berthezene's flank.  These forces consisted not only of infantry, but also artillery and cavalry.  Vandamme had a tricky decision to make, if he ordered Domon to move to support Berthezene it would open up the left flank of Lefol.  Could Lefol hold on until Girard arrived? However, if Domon remained in position, Berthezene's 4 battalions would struggle to hold off twice their number of infantry, especially as the Austrians had cavalry and artillery support.  Turning to his ADC, Vandamme dictated an order moving Domon's cavalry south to support Berthezene.  As the aide galloped off, another ADC was sent with a message impressing on Girard the need for speed in moving forward to support Lefol  Orders were also despatched to Habert, ordering him forward to support Berthezene.  With all his available forces committed, Vandamme could now  only wait on events.

Deutschmeister attack
Lefol's men were now firing volleys at the advancing Austrians, supported by canister fire from the artillery.  The Austrians countered by sending their jaeger forward to pick of the gunners.  The French fire seemed to slacken and sensing an opportunity, Rosenburg ordered his men to charge the enemy line.  French volleys stopped some of the attacks, but on the French left, the volley of the third battalion of the 46th Ligne failed to stop 1st Battalion Deutschmeister, who fell on their foes with levelled bayonets and drove them back in disorder.  Behind the 3rd battalion stood the 4th/46 and as the officers shouted themselves hoarse ordering their men to 'stand firm', Deutschmeister swept on. The 4th was all that stood between the Austrians and an open flank, but in the end they passed the test.  Perhaps disordered by their earlier charge and being sniped at by French voltigeurs to their flank the Austrians could not repeat their success and were bundled back down the slope.  For the moment the French flank was preserved.  All along the front the Austrian attack had been repulsed and the two sides paused to take breath.

The Austrian cavalry attack
On the French right matters were serious.  Hessen-Homburg had ordered his cavalry forward and they charged the French line.  In the lead were the Merveldt Uhlans and they were caught by a round of canister as they neared the slope; a volley stopped them in their tracks and then a second round of canister drove them from the field.  Behind them, the Stipsicz Hussars rode down the 3rd battalion 2nd Marine Infantry before they could form square, but were then met by the 28th Dragoons from Domon's cavalry brigade.  Caught by the heavier cavalry the Austrians fell back to reform.  Seeing a chance to disrupt the Austrian advance the colonel of the 28th ordered his men to attack the leading Austrian infantry battalion.  However, the Austrians formed square and drove off their aggressors and the Austrian artillery inflicted further casualties as the French cavalry fell back.

Ocksay had attacked the Abbey again, IR Zach leading the way.  The Austrians forced their way into the buildings and drove out the 3rd Legere who formed the garrison.  Berthezene's battalions were now attacked from front and flank and matters were made worse when 2nd battalion 2nd Marine Infantry were overrun by a charge by grenadier battalion Reuber.  Fortunately, Habert's division had now moved up and helped to stem the Austrian advance.

Lefol's men are pushed back
Vandamme's final reserve, Rey's infantry division now entered the field and received orders to advance with all speed to support Lefol.  As it advanced, Frolich's Austrian division appeared on it's flank.  However, Frolich's men turned to their left and moved after Girard's infantry, leaving Rey to continue his advance.  In spite of the orders to advance with all speed, Girard had not changed to column formation, but advanced in line.  This had allowed Frolich's men to gain on him and with all eyes on the conflict before them, where Lefol's men were struggling to hold the plateau, the French were caught napping.  As the orders were given to charge the enemy before them, two battalions found themselves attacked from the rear.  All order was lost and Girard's division was finished as a fighting force before it could take part in the battle.

Just as this disaster befell the French, the Austrians mounted a third attack against Lefol.  By now the fire from the artillery was weaker and the volleys less effective and grudgingly the French had to give ground.  Vandamme was staring defeat in the face, but at the vital moment Rey's men crested the ridge onto the plateau.  Their arrival gave heart to Lefol's weary men and they reformed their lines. As the Austrians pressed forward they were met by volleys and their advance faltered.  On the French right Habert had managed to contain Hessen-Homburg's advance, though Berthezene's division was destroyed.

At this point we had to call a halt and the action was declared a draw, though the advantage lay with the Austrians.  Two French divisions had been destroyed and one Austrian.  The scenario notes required three destroyed divisions for a 'victory'.  It had been a close fought game and both Steve and I had felt we had a chance of victory.

The scenario had come from Chris Lleach's "Fields of Glory" scenarios for shako rules and was actually Rivoli, though with no Revolutionary period figures I transposed the action to Germany in 1813.