It has been too long since the Grand Alliance figures escaped from their boxes and so for the game this week I devised a scenario loosely based on the attack on the Schellenberg from the Duke of Marlborough's Blenheim campaign in 1704. It is the spring of 1694 and the Graf von Grommitt has received his orders to advance to the Rhine and recover the lands lost to the French in the previous campaigning season. The first step will be the recapture of the town of Neustadt.
 |
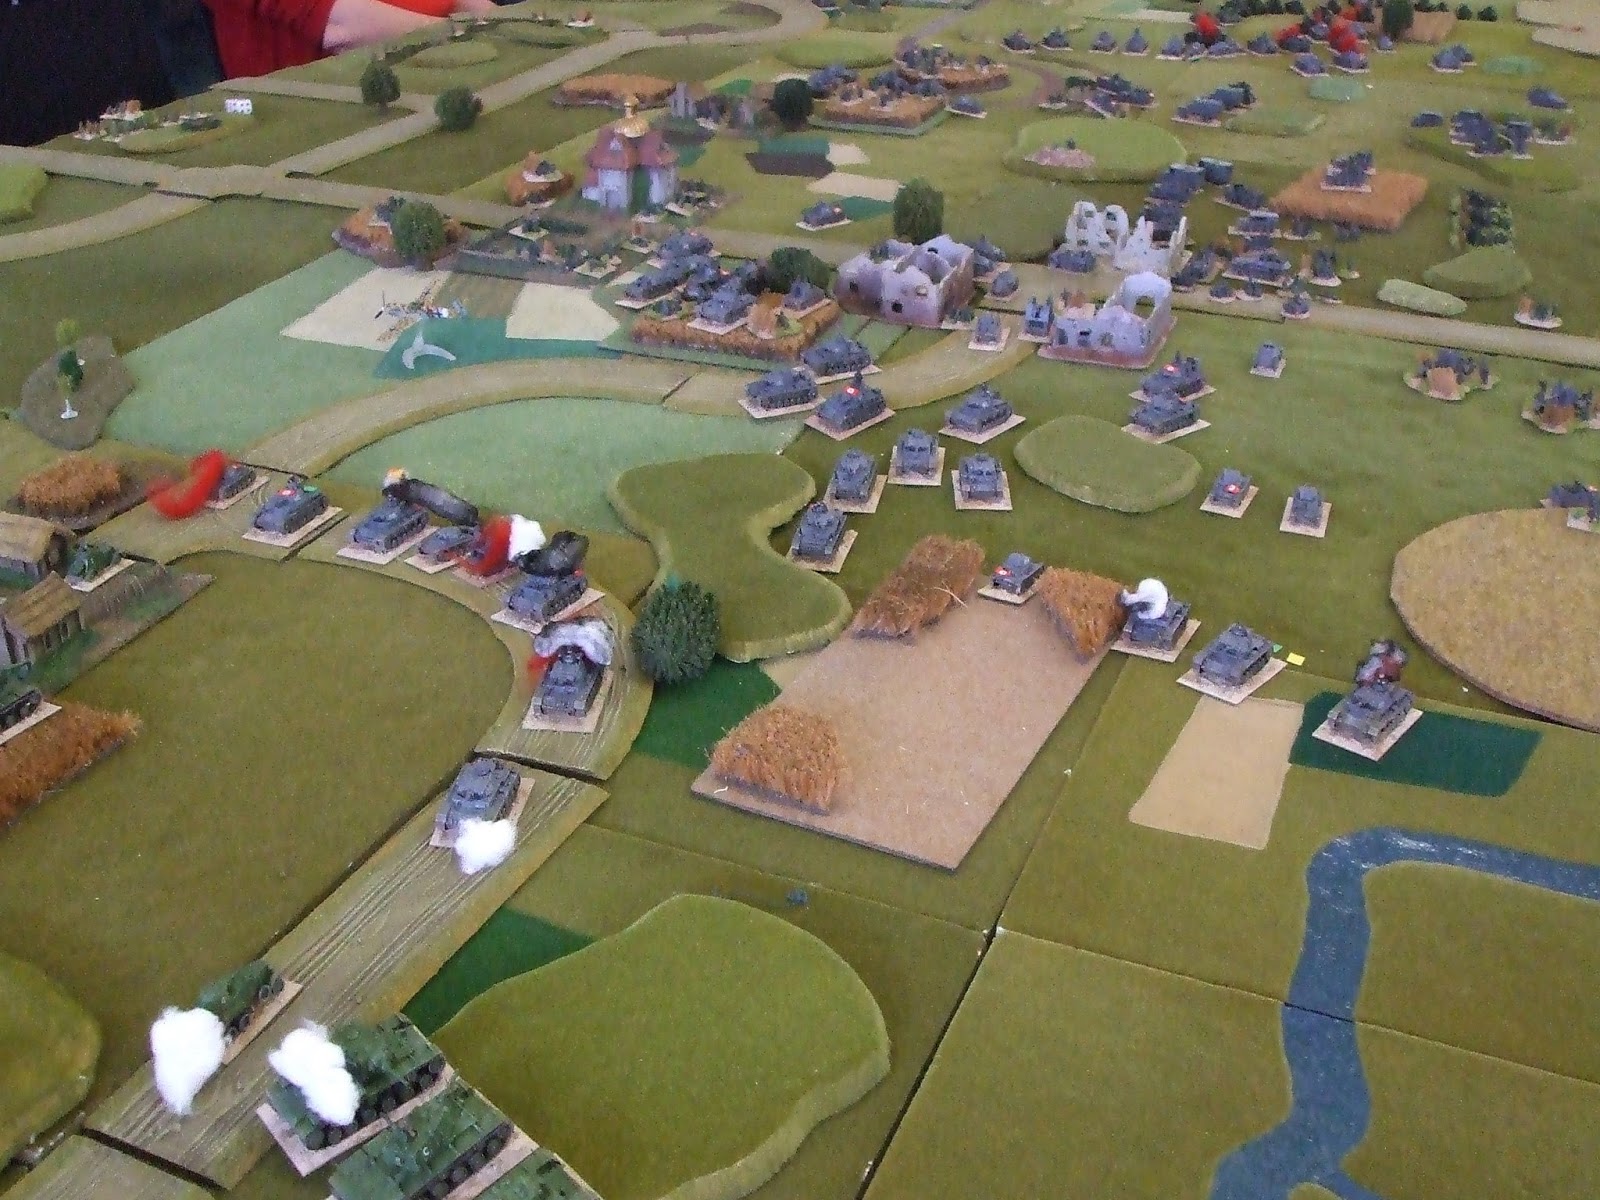
| General view of the battlefield looking towards the Konigsberg |
Neustadt has an old medieval wall which would not stand up to a bombardment for long, but the only site for placing a battery is on the hill outside the town, the Konigsberg. The French commander, the Comte de Salle Forde has recognised the importance of the Konigsberg and had a redoubt constructed on it. Work to link this redoubt to the town is under way, but is not yet complete. Von Grommitt's plan is to seize the redoubt with his grenadiers and then, when the enemy launch their counter attack, send his reserve forward to hit them in the flank. The Comte has a brigade camped on the flat land below the Konigsberg and a second brigade quartered in the town.
 |
| The grenadiers and Austrians prepare to advance |
At first everything proceeded according to plan for Von Grommitt. His battalions of grenadiers, (supported by two Austrian battalions), made rapid progress towards the redoubt. Ignoring close range artillery fire the Palatinate grenadiers stormed up the slope and over the works. The artillerymen offered only token resistance before taking to their heels and heading back towards the town. On the way they passed the battalions of French infantry which were forming up and heading towards the threatened redoubt. In the redoubt, the Wettigny Dragoons were hanging on grimly. Their initial volley had been well directed and had brought the Hessian grenadiers advance to a stop. As the Hessians attempted to reorder their ranks, (a task which took far longer than it should), it gave the dragoons time to turn to face the Palatinate troops. After an exchange of volleys, the grenadiers fixed bayonets and charged their opponents. The French closing volley was ineffective and they were unable to stand against the charge. However, they had bought the time necessary for the rest of the brigade to arrive.
 |
| The fight for the redoubt |
So far, only the Palatinate grenadiers had managed to get into the works. The battalion of Austrians supporting them (Regiment Furstenberg), had become disordered by the terrain and the Hessian grenadiers were still struggling to reform, thus blocking the second Austrian units advance. To make matters worse for the Hessian grenadiers they now came under fire from Solre who had advanced to the line of the partially completed works to support D'Humieres and Rouergue in their attack up the Konigsberg.
To the relief of the French, the second brigade of infantry now began to arrive from Neustadt. Led in person by the Comte, they stepped forward with purpose, heading towards the hill. The leading battalions crossed the partially completed works, reformed and then charged towards the Hessian grenadiers. After a brief resistance they fell back behind their supporting unit, Metternich. The Austrians stood their ground, fired a telling volley and then charged the leading French battalion. This too failed to stand and fell back to reform. Action here, below the hill became a fire fight. Up on the hill the Palatinate grenadiers were at last joined by their supports. Having fitted their plug bayonets, the grenadiers were unable to fire a volley, their only option was to charge. As the line swept forward the French fired a devastating volley which stopped the Palatinate troops in their tracks. When this was followed up by a charge, the grenadiers had to give ground and fell back behind the Austrians. Regiment Furstenberg levelled their muskets and fired as the French closed, but it was not enough to stop regiment Rouergue. Supported by regiment D'Humieres, Rouergue forced the Austrians back against the works. A final push and the works were recovered and the units of Von Grommitt's force were back where they started.
 |
| The Austrians ejected from the redoubt |
Fortunately for Von Grommitt his second brigade now arrived and advanced quickly towards the partially completed works. The Comte saw the danger and deployed three battalions to hold the works and personally led two more towards the threatened sector. His men arrived just in time. Regiment Zurlaben had been attacked by Hessian regiments Erbprinz, and Lowenstein. Although the French had held the first attack, a renewed effort had forced its way over the works. Zurlaben was falling back in disorder and had dragged Toulouse with it leaving a gaping hole in the French lines. Von Grommitt's plan seemed to be on the verge of success, but on the allied left, below the hill affairs had taken a turn for the worse.
 |
| The Hessians advance into the French position |
The Palatinate grenadiers had failed to rally following their defeat by Rouergue and left the field. Both of the Austrian battalions were attempting to rally following suffering heavy casualties. To relieve the pressure the Hessian grenadiers advanced again and began to fire volleys against the French holding the redoubt. At this point, the Wettigny dragoons, recovered from their earlier drubbing, crossed the works and took up a position flanking the grenadiers. Their volley, combined with one from the redoubt inflicted such heavy casualties that the grenadiers broke and routed from the field. The remains of the allied brigade were now so battered that they began to edge back away from the battle. With the French now able to bring their full strength against his remaining brigade, Von Grommitt had to order the retreat and leave the field to the French.
 |
The Wettigny dragoons drive off the Hessian grenadiers
|