Saturday 30 January 2016

Not so quietly flows the Don; a Pike and Shotte scenario

A couple of weeks ago Steve and I tried an eastern renaissance scenario using the unofficial Pike and Shotte supplement by Thaddeus Urban.  This week we did another game test, again using the Cossacks, but this time their opponents were Muscovites.  The outline was that the Tsar was keen to extend his domain southwards along the river Don and had dispatched an army to accomplish this. Not surprising this move was opposed by the Cossacks who lived in the area and resistance centred around a settlement on an island in the Don.

The Muscovite infantry force consisted of 4 units of Streltsy, 2 of Border Musketeers and 1 Soldat unit, supported by two medium and 1 heavy gun.  Accompanying them were 2 units of Reiter and six units of Boyar cavalry.  The force was arrayed in the standard fashion of an infantry centre with cavalry on the wings.

The Muscovite centre ready to advance
Opposing them was a Cossack force of five infantry units (3 Moloisty, mixed spear and musket units, 1 unit of registered Cossack musketeers and a unit of 'Adventurers') and 5 cavalry units,  Two of the cavalry units were skirmishers with three regular.  In addition the Cossacks had three light guns, 1 deployed to support the Registered Cossacks and 2 in an earthwork on the island, where they could fire on the flank of any attack on the main force.

The Cossacks await the attack

The only access to the island was behind the Cossack force so the objective for the Muscovites was simple, break through the enemy line.  For the Cossacks, it was hold your position.

Religious inspiration for the troops
A roll of the dice resulted in Steve commanding the Muscovites and his left wing cavalry lost no time in charging forward against the Cossack skirmish cavalry.  One unit managed to fire and evade, but the other was caught napping and suffered accordingly.  The remnants streamed towards the baseline and then routed off into the distance.  The Boyars then carried on into my supporting unit and after a sharp melee drove them back in disorder, but at least they stayed on the table. (One of the disadvantages of using a 6ft x 4ft table and 25mm figures is that the baselines are always fairly close!).  However, the Boyars had now taken heavy casualties and a charge by my reserve drove them back.  As they fled in disorder they also disordered their supports and my cavalry took advantage and charged them.  In no time a second unit of Boyars was driven back in disorder.  This set the pattern for an ongoing cavalry melee which lasted throughout the game, with the initiative passing between us as units recovered and were thrown into the fray again.

The Muscovite cavalry on the opposite flank also attacked, but the leading unit of Boyars was disordered by the fire of the light artillery on the island and had to pull back to reform.  A supporting unit carried on the advance, but was driven back by a volley from one of the Moloisty units.   In the centre the Streltsy advanced towards the low hill held by the registered Cossack unit.  This fired a volley, but it had little effect.  The colonel ordered the supporting artillery to fire on the streltsy, but the shock of first shot broke the axle of the gun and that was the end of their 'support'.  (Actually I managed to roll a double 1 for the artillery fire, which in Pike and Shotte means that the gun is out of action for the rest of the game)

The Cossacks stand firm
Once the Muscovite right wing cavalry had reformed they advanced again, this time supported by the Reiter regiments.  Once again they ran the gauntlet of the artillery on the island, but this time they got through unscathed.  A closing volley from the Cossack infantry failed to stop them and the leading units of cavalry crashed into the infantry.  The spears carried by the Cossacks helped to offset the impetus of the cavalry and both sides lost heavily in the melee, but the Cossacks just prevailed.  As the Boyars fell back the Reiter steadied themselves and then advanced.  They hit the Cossack infantry before they fully recovered from the previous melee.  Although they did their best, the blue Moloisty regiment broke and fled from the field.  However, they had done enough to shake the Reiter and the horsemen could not follow up their success.  This gave a supporting Cossack unit the chance to fire a volley, which did enough damage to force the Reiter to retire in disorder.
The streltsy advance
Seeing the gap on the left the Cossack commander ordered the 'adventurers' to move to take up a position in the front line.  This did remove some support from the Cossacks on the hill, but filling the gap was more important.  As the streltsy plodded forward towards the hill the registered Cossacks continued to fire volleys, but seemingly with little effect.  Once the streltsy were in range they fired back and they had a medium gun in support.  Their combined fire inflicted heavy casualties on the Cossacks, who really missed the support of the light gun.  Seeing the Cossacks weakening the streltsy charged forward.

The streltsy charge home
As the pressure mounted in the centre, the Muscovite right wing cavalry attacked again.  The Reiter charged one Moloisty unit and defeated them in short order.  Sweeping forward they caught the 'advanturers' still moving towards the left flank.  Still in column the 'adventurers' stood no chance and were driven from the field.  My left flank had disappeared.

The reiter break through
At the same time the registered cossacks were driven back by the streltsy.  By now over half my army had routed and half the remainder were disordered.  The Cossacks had lost.
 

Monday 25 January 2016

Battle of Valle del Fiume :an Italian Wars scenario

It has been some time since Steve's Italian Wars figures featured on the blog so this weeks post marks a welcome return.  This is an imaginary scenario where French and Imperial forces clash as they both seek to control an important crossing of the river Fiume.  Each side had a roster  of their troops and it was up to the army commander to split them into three commands. A dice roll decided that I would command the French (more Gendarmes and artillery, but fewer pikemen and lighter cavalry).  I decided to put all my lighter cavalry on the right, supported by two light guns and two units of crossbowmen and a unit of halberdiers.  Their task was to occupy the enemy on their side of the river whilst the bulk of my forces secured the bridge and defeated the Imperial forces opposing them.  The river could be fordable, both sides were unsure of its depth and would have to dice to discover if there was a ford after holding the bank on a particular stretch for one move.

The Imperialists advance
The Imperialists won the initiative and deployed.  It soon became clear that Steve had allocated the bulk of his pikemen and missile foot to his right, where they opposed my pikemen and gendarmes and outnumbered missile foot.  His left and centre contained all his cavalry plus the remaining infantry.  Both sides were attacking 'en oblique' leading with their left.

The troops on my right were the first into action.  Both sets of cavalry moved forward briskly and although outnumbered, the French managed to hold their position.  Steve suffered from a run of low 'pip' dice which delayed his infantry and allowed me to concentrate on allocating my 'pip' dice to maintaining the cohesion of my cavalry.

View from the French left
In the centre I had planned to push the gendarmes over the bridge, but, with their progress delayed by the terrain, the Imperialist foot were close to sealing off this option.  Just in time the forward unit crossed, but with limited room to deploy.  The second unit tried to find a ford, but instead ran into a hail of fire from a missile unit which totally disordered them and finished them as a fighting unit.
Cavalry action on the French right
With plan A in ruins I decided that, with my right seemingly handling the Imperialist attack, I would swing the pike blocks from the centre towards the Imperialist right which was giving my left flank some considerable problems.  Each time my left tried to advance they were disordered by missile fire, particularly my last remaining unit of gendarmes. They made 3 or 4 attempts to charge home, being stopped each time by close range fire.  My one advantage was that the Imperialists were hemmed in by woods which made it difficult to deploy their numerical advantage.  They had also obligingly left their flank 'in the air'.  Forward plodded my pikemen and engaged the Imperialist pikes defending the flank of their missile foot.  In a short melee the Imperialists were totally defeated.  Success beckoned!

The attacks develop
On my right, the situation had deteriorated.  The Imperialists had at last brought forward their cavalry reserve (gendarmes) and these crashed through my weary cavalry, scattering them to the winds.  All that remained was 2 units of missile foot supported by the light artillery and halberdiers.  Their fire held off the first Imperialist attack, but a second was pressed home and the remaining Imperialist cavalry was working around the missile foot's flank.  The writing was on the wall for my right flank.

The French pikes drive forward
At this point, time ran out.  The centre was a stand off, neither side could cross the bridge and establish a bridgehead.  Each side had lost (or was losing) a flank, so we declared a draw.

Sunday 17 January 2016

Pike and Shotte; Poles versus Cossacks and Tartars

Steve and I have experimented with a few rule sets when fighting eastern european battles and the latest was Pike and Shotte.  The army lists we used were ones I had cobbled together and although they worked so so, there seemed to be something lacking.  Wandering down the leafy lanes of the internet I came across a blog where Thaddeus Urban had taken the time to put together not only the army lists for Muscovites, Cossacks and Tartars, but also a potted history and a list of historical characters.  (This is available to download from post 16 on the link above, and is called "Edge of Empires, early modern warfare in Eastern Europe").  Included were a few special rules, firing from the saddle, gun shy and spear company, which offered the opportunity to reflect more accurately the eastern way of fighting.  Inspired, I set up a scenario pitting a small Polish force against a much larger alliance of Tartars and Cossacks.  It was very loosely based on the battle of  Podhajce (1667).  The Polish position was flanked by impassable terrain meaning the alliance had to attack head on, nullifying their usual enveloping tactics.  Hildinger (HILDINGER, Erik, Warriors of the Steppe.  Spellmount, 1997) gave it as an example of the supremacy of firepower over the usual tactics of the steppe peoples.

Polish Levy infantry
The Polish force consisted of two units of Haiduks with a unit of levy infantry ensconced in a wagonberg.  The latter were supported by a light gun.  On the flanks were two medium guns in earthworks.  In reserve were two units of pancerni and one small unit of Hussars.  The goal of the Polish force was to hold their position and prevent the alliance advancing on the town of Podhajce which lay behind them.

Opposing them was a force of 7 units of tartar cavalry, together with a further 7 units of Cossack cavalry.  In support were 5 units of Cossack foot, 3 spear and musket Moloisty units, 1 unit of registered cossacks and a unit of 'adventurers'.  The force lacked any artillery.  There objective was to brush aside the Polish force and capture Podhajce.

The Cossack forces
A roll of the dice decided that I would command the Poles.  Steve duly sent forward the first wave of skirmish cavalry to harass the Polish infantry.  As they got into range my artillery opened fire to devastating effect - for the Poles!  Pike and Shotte includes a rule whereby any artillery fire which includes 2 '1's results in the gun not being able to fire again that game.  My first roll for the light gun put it out of action,  My second disabled one of the flanking guns.  In no time at all the very essence of Sobieski's strategy of firepower had been undermined.  On the plus side, the 'Gun shy' rule did manage to disorder some of the Tartar cavalry and force them to fall back to regroup.  Volleys from the Haiduks also drove off the first wave of Cossack cavalry.  When the Cossack infantry reached the front, one large unit of Moloisty targeted the Polish levy and charged home.  Even with the benefit of the wagons and supports the levy lost the melee and routed.  Unfortunately, that initiated a test on the supports.  Both units of Haiduks failed one routing, the other falling back in disorder.  The final blow came when the Hussars took their break test (as a supporting unit) and they also routed off the table. With half the army gone I had no option but to concede defeat.

The Moloisty attack
After lunch we replayed the battle, swapping sides.  Steve opted for a more aggressive defence and when opportunity allowed charged out with his cavalry.  My cavalry were unable to stand up to the attacks and one by one my units were forced back in disorder.  However, as Steve continued to push forward his losses increased, eventually resulting in them being 'shaken'.  This gave my cavalry the opportunity to charge and with this added impetus the tide turned.  Outflanked and outnumbered the Poles were forced back behind their infantry.  My further attacks made little progress against the combination of artillery and musket and in the end I had to concede defeat again.

The Pancerni broken by the Cossack horse
The special rules and lists seemed to work well (once my erratic dice rolling was removed from the equation) and we will try them again on a more open field which gives the steppe armies more freedom of manoeuvre.  My apologies about the photographs for this blog, I was struggling against some unseasonable sunshine flooding in through the window.

The Haiduks drive off a unit of Cossacks

Tuesday 12 January 2016

Return to the boats; a Sudan scenario for 'Battles for Empire'

For the first game of 2016 Steve and I returned to the Sudan.  The background to the scenario is that news has reached Khartoum that enemy forces are gathering at an oasis a few miles from the river port of Wad Alzaky.  The General has ordered a sortie to disperse theDervishes and with only two steamers available, (the Sultan and the Victoria), it has been decided that there is insufficient space to transport the cavalry.  Brigadier Anstruther is the officer in charge, with a brigade of British troops (4 battalions plus a machine gun and field gun) and a brigade of Egyptian troops, also consisting of 4 battalions plus a machine gun and field gun.  Each steamer has a unit of blue jackets to protect them whilst the army is marching inland.  Lieutenant Firth- Newsome (who has featured in reports of earlier actions), has been appointed as ADC to Brigadier Anstruther, whilst midshipmen Bolitho has secured a place in the unit of blue jackets on the 'Victoria'.

The troops left Khartoum as night was falling and sailed south up the Nile. To mislead the Dervishes they sailed past Wad Alkazy during the day, only returning once night had fallen.  Disembarking they marched for the Jamaldeen Oasis before dawn, achieving complete surprise when they attacked. After a brisk fight the Dervishes were dispersed and mission accomplished the column formed up to return to Wad Alkazy.  Spirits among the troops were high as they neared the Nile.  This is the point at which our game begins.

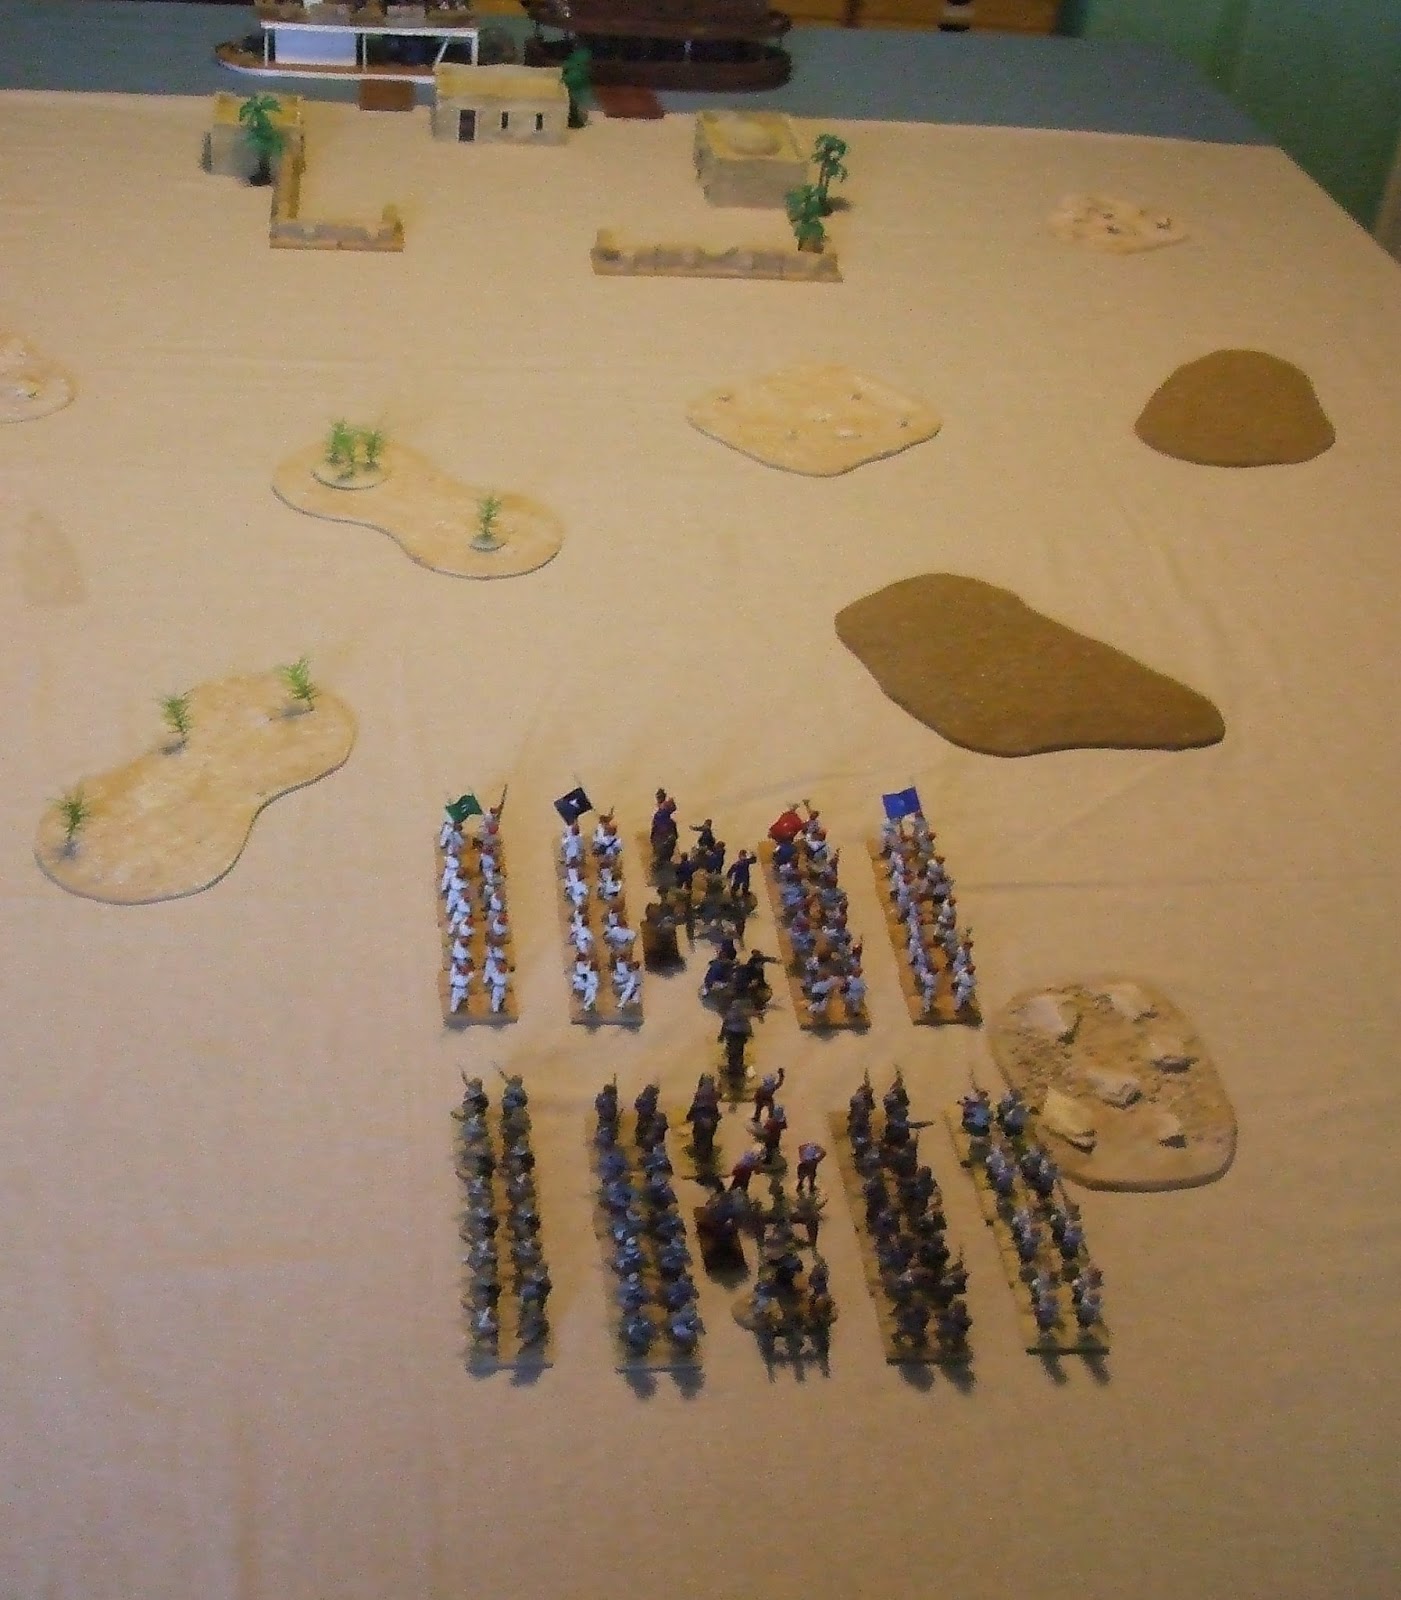
Looking west towards the Nile and Wad Alkazy
I was given command of the Imperial troops and a number of dice, which I later found out determined the time and location of arriving Dervish troops.  Far from achieving their mission the Imperial troops had been drawn into a trap, with considerable native forces concentrating to attack them before they reached the steamers.  Nor were the blue jackets to be mere spectators, a boat of native troops appeared up river, determined to capture the 'Victoria'.

Anstruther received the unwelcome news that a large dust cloud was approaching from the east.  He immediately dispatched Firth-Newsome  with orders for two of the British battalions to deploy into line and with the support of the machine gun stop the enemy advance.  The remaining two battalions of the British brigade, together with the field gun, would deploy further back to cover the retreat of the first line; whilst the Egyptian brigade was to march quickly to Wad Alkazy, take up a defensive position and cover the retreat of the British troops.  Firth-Newsome delivered the message and watched as, with parade ground precision, the British troops formed line and the machine gun deployed for action.  The leading ranks of the Dervish forces appeared through the dust and the British volleys began their deadly work.  Despite their undoubted courage the Dervishes could not advance further into the maelstrom of lead and their commander ordered his supporting units to deploy to the flanks to work round the British line.

The rearguard deploys
Further ahead, Ahmed Bey, the commander of the Egyptian brigade was running into trouble.  His leading troops were in sight of Wad Alkazy, but to both flanks large enemy formations were approaching rapidly.  Before he could form a brigade square his flank units were charged, the 4th battalion by camel troops and the 2nd by Dervish infantry.   Caught at a disadvantage the Egyptians fought bravely,standing their ground and in spite of heavy casualties refusing to break.  However, all hope of reaching the steamers unopposed was now lost.

The Egyptians come under attack
On the Victoria Bolitho was in the thick of the action.  The Dervish attack had been spotted in time for a volley to be fired, but this had not stopped the assault.  As the Dervish swarmed on board they were met by cutlass wielding tars determined to drive them back.  No quarter was sought or given in the melee, but with a last desperate push the Dervish were forced back onto their craft.  As they moved back upriver the defenders of the Victoria regrouped and sent them on their way with a volley. The 'Sultan' had cast off and manoeuvred  to fire its machine gun at the Dervishes.  This added fire caused more casualties and the remaining enemy lost heart and sailed back south.

The Sultan and Victoria prior to the Dervish attack
Back in the desert, the fire from the British rearguard was slackening.  The Highlanders on the right of the line were running low on ammunition and to their right a large body of Dervish infantry were threatening to outflank them.  The machine gun had jammed and Brigadier Anstruther ordered the British to form brigade square and this was done, but it delayed the distribution of further ammunition to the Highlanders.  Sensing an opportunity the Dervish infantry closed with the British in a fanatical charge; ignoring the Highlanders final volley.  There should have been a supporting charge by a second Dervish unit, but it was stopped by fire from the field gun.  This undoubtedly saved the Highlanders  from being overwhelmed.  The Egyptian field gun was also making a vital contribution.  Its fire stopped an attack by Dervish cavalry which would have hit the flank of the Egyptian infantry.
The British square under attack
On the south side of the British square the second Highland battalion had driven off an attack with sustained rapid fire, but in doing so had depleted its ammunition.  Before the stocks could be replenished the southern horizon filled with yet more Dervish troops eager to fight. The machine gun crew at last cleared the jammed mechanism and fired in support of the first Highland battalion, but in doing so jammed the mechanism again.  It was all to no avail as a second Dervish unit attacked the beleaguered Highlanders.  Weakened by their casualties and heavily outnumbered the British line gave way, the brigade square was broken!
The square breaks
Brigadier Anstruther immediately sent orders for each battalion to form its own square.  Fortunately, the remaining battalions had sufficient time to do this before the Dervish attacked again.  They were also saved by the valour of the men of the Royal Artillery, who, rather than running back to the nearest square, stood by their guns and fired a devastating close range salvo into the Dervish unit which had broken the Highlanders.  This salvo caused such heavy casualties that the unit took no further part in the battle.

Ahmed Bey was struggling to hold his command together.  Two battalions had fought themselves to destruction, but their sacrifice had enabled the remaining battalions to form up and prepare for the next Dervish onslaught.  The artillery was excelling itself, destroying one unit of cavalry and stopping another as it attempted to charge home.  The machine gun had tried to fire in support of the infantry, but had jammed and now the crew were struggling to clear the jam.

The Dervishes attack Wad Alkazy
One group of Dervish had been ordered to attack and hold Wad Alkazy.  This move had been spotted by the captains of the steamers and they decided that they should cast off and manoeuvre so that they could bring all their firepower to bear on the attackers.  Along with the other blue jackets Bolitho lines the side of the Victoria awaiting the order to fire.  As the Dervishes swept into the village square the order to fire rang out and the natives were swept by a maelstrom of bullets.  The Dervish charge staggered to a halt and although small knots of brave individuals attempted to move forward, further volleys quickly stopped them.  Although the fire slackened as the machine guns jammed, the blue jackets were able to deliver enough firepower to force the remaining Dervishes to retreat.

The crisis of the battle was now approaching.  The Emir saw that his men were tiring, but one final push may secure victory.  Orders went out to press home the attacks on the Imperial forces.  From his position in the square formed by the South Essex, Firth Newsome could see the enemy attack developing.  To his right the square of the Rutlands was attacked by two units.  The Rutlands had the machine gun as support and this fired into the nearest enemy unit.  However, once again mechanical failure quickly appeared and whilst the crew worked feverishly to clear the jam the enemy were upon them.  Fighting against overwhelming odds the brave gunners stood by their gun in a hopeless struggle.  One by one they were cut down, but each gallant Briton was surrounded by a number of enemy dead.  The third square, formed by the highlanders was also attacked by two units.  With the highlanders low on ammunition the South Essex tried to give supporting fire, but it proved insufficient to stop the determined Dervish charge.  The highlanders absorbed the shock of the charge, but gradually weight of numbers began to tell.  Colonel Munro the commander of the highlanders saw Dervish troops forcing their way through the ranks and into the square.  Moving forward he dispatched several with shots from his revolver.  When this was empty he drew his claymore and waded into the melee.  Order began to break down as clumps of highlanders formed, each fighting against numerous opponents.  Colonel Munro was one of the last to fall, surrounded by a mob of the enemy.

The highlanders square is overwhelmed
The Egyptians were also attacked.  On the left the 1st battalion was charged by a Dervish unit, but a period of sustained fire, plus some assistance from their machine gun, (which jammed again), managed to stop the attack.  Another attack was made against the field gun, but once again the artillery crew excelled themselves, laying down such a curtain of fire that the attack petered out.

Almost as soon as it began, the attack was over.  The Emir decided that he should pull back his forces and regroup.  Anstruther was too aware of the tiredness of his troops to order any pursuit.  Aided by parties from the steamers the dead were buried and the wounded transferred to the ships.  Finally, as dusk fell, the weary Imperial troops marched into Wad Alkazy, ready to board the steamers and return to Khartoum.  Once back, Brigadier Anstruther wrote a report which highlighted the excellent conduct of the Egyptian troops.  He also pointed out the need to look at the provision of ammunition with a view to avoiding the likelihood of the infantry running low during periods of sustained firing.  However, the key point in his report was the inadequacy of the current machine guns, which were far too prone to jamming at the very moment they were needed most.